Profile Navigation

ARCO enables you to manage a large number of components and devices by segregating them into an easily accessible control scheme.

ARCO Platforms features intuitive and context-sensitive user interface to able you to navigate the Profile Management module efficiently.
Panel names, configuration options and data fields may vary slightly but the navigation interface will remain the same.

Quick Access Bar

A navigation tool is perpetually available for easy access as your scroll down the profile page.

  • Navigation Tab – Enables you to quickly switch to configuration options for the profile.

    -> Configurations – Enables you to manage the devices installed on the profile.
    -> Services – Enables you to manage internal and third-party services on the profile.
    -> Rules – Enables you to manage rules that automate different processes in your system.
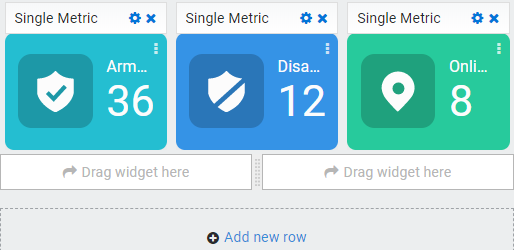
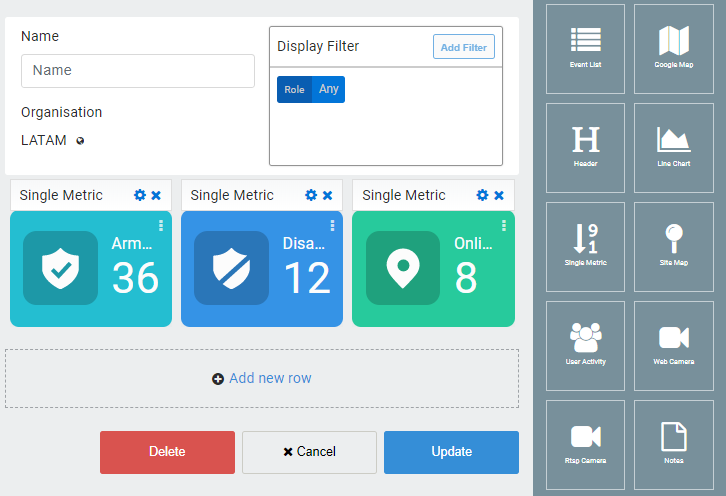
    -> Widgets – Enables you to manage widgets presented on the Dashboard.

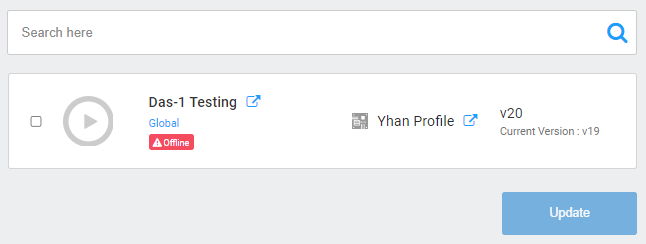
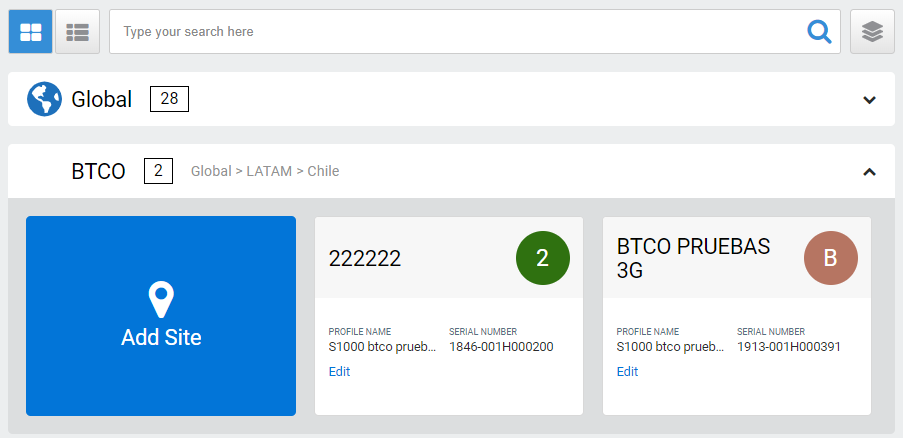
  • Search bar – Enables you to search for specific devices within the device by name. The search bar automatically starts searching after typing at least four characters.

  • Create – Finalise and implement the configured Hardware Profile.

  • Tag Peek – Toggle ON or OFF to display the searchable meta tags on the device panels.

Device Panel Interface

ARCO displays all relevant information and available configuration control of a specific device in one Device Panel.

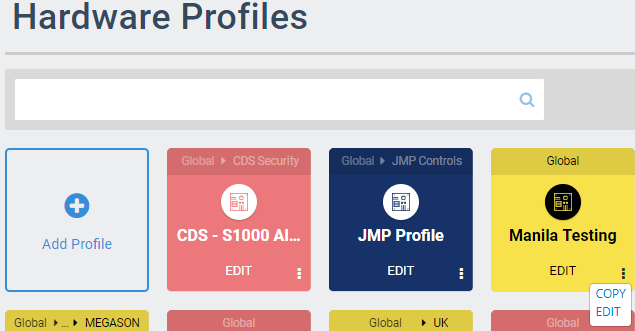
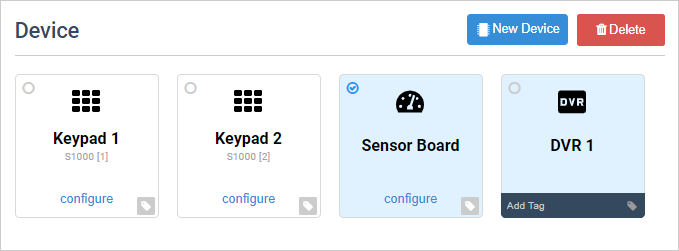
  • New Device button – Enables you to add a new device to the current profile. Each device type and relative information are listed below.

  • Delete – Click to delete panels with the check icon.

  • Device Panel – Displays the name of the device and relevant information. A plain display denotes the device is installed directly to the S1000 Smart Controller. If the Device Panel is displayed with a different color, it denotes the device is installed through an expansion equipment or a third-party device.

  • Configure – Click to modify the device settings.

  • Mark – Click to toggle the delete button.

  • Add Tag – Click to add meta tags on the device.

ARCO Platform features context-sensitive interface that will guide you at every step of the process.

Hardware Profiles

ARCO enables you to manage large numbers of similar sites that share the same configuration, the same firmware, the same macros, and the same alarm-reporting rules.

When the settings on a profile are changed, all sites using this profile is updated with the new settings.

  • Search bar – Enables you to search for specific profiles using their name or description. The search bar automatically starts searching after typing at least four characters.

  • Add Profile Panel – Enables you to add new profiles in ARCO. The next section will discuss the full details about adding profiles.

  • Profile Panel – Displays the available profiles in the system.

  • Edit – Update the information on the selected Profile.

  • Quick Access – Click the dots to display the following commands.

    -> Copy – Create a new Profile using the same data.
    -> Edit – Update the information on the selected Profile.

Update Site

ARCO enables you to update S1000 Smart Controllers within the system remotely.

  • Search bar – Enables you to search for specific Sites.

  • Site List – Displays the complete list of Sites in your organisation. Each column contains the following information:

    -> Checkbox – You can click on the checkbox to perform an Update action on the selected sites. Several sites can be selected at once. Clicking on the topmost checkbox selects all sites displayed.
    -> Site Name – This column displays the Site’s main identifier in ARCO. Site names need to be unique. The names are listed in alphabetical order by default.
    -> Organisation – This column displays the organisation the site belongs to.
    -> Profile Name – This column displays the Site’s profile settings in ARCO.
    -> Current Version – This column displays the current firmware version of the site.
    -> New Version – This column displays the new firmware version available for the site.

  • Update Selected button – Enables you to update the selected sites firmware in ARCO. The next section will discuss the full details about updating the firmware.

Alarm Dashboard

ARCO enables you to monitor quick and detailed communication between system sensors and the S1000 Smart Controller with a centralised Alarm monitoring module.

Alarm Navigation

ARCO enables you to monitor quick and detailed communication between system sensors and the S1000 Smart Controller with a centralised Alarm monitoring module.

  • Active Alarm – Displays the numerical value of all currently active alarms in the system.
    Clicking on the Alarm Panel sends you to the Alarm Dashboard.

  • Dismiss All – Click to ignore all active alarms in the system.

  • Alarm Name – Displays the custom name of the alarm. Please refer to the Alarm Kind section below for more details.

  • Alarm Icon – Displays the custom icon of the alarm. Please refer to the Alarm Kind section below for more details.

  • Alarm Details – Displays the timestamp of the alarm and the event name trigger.

  • Control Buttons – Click to suspend or dismiss the selected alarm.

Site Navigation

Multiple devices monitor information and control functions of the system. ARCO enables the central management of rights for accessing areas, the opening of site doors and locks that are distributed to the credentials held by engineers and other personnel. ARCO enables you to manage different locations in your system as Sites and configure them into Profiles.

The Sites is the default page displayed when clicking the Hardware module.

  • Search bar – Enables you to search for specific Sites by their Name.

  • Organisation filter – Click to open and close panels for each organisation.

  • Add Site card– Enables you to add a new site in ARCO. The next section will discuss the full details about adding sites.

  • Card Panel – Displays the details of the Site. Click to view the Site Dashboard.

  • Edit – Modify the site information.

Widget Types

A variety of Widgets are available based on what information you want to display on your Dashboard.

Event List

Displays a chronological list of events in real-time.

Configuration Options

  • Max Events – Define the number of events to display.
  • Use Elastic – Toggle ON or OFF
  • Display Events – Select from the drop-down menu.

Google Map

Displays a map with pin locations for all available sites.

Configuration Options

  • Height – Define the map height in pixels or percent screen coverage

Header

Displays configurable title and description to help organise widgets.

Configuration Options

  • Header – Displays text in large font.
  • Subheader – Displays text in small font.
  • Splitter – Check to display a vertical line to divide sections visually.


Single Metric

Displays the real-time value of a single data point.

Configuration Options

  • Armed Areas – Displays the number of armed areas.
  • Armed Sites – Displays the number of armed sites.
  • Disarmed Areas – Displays the number of disarmed sites.
  • Disarmed Sites – Displays the number of disarmed sites.
  • Offline Sites – Displays the number of offline sites.
  • Online Sites – Displays the number of online sites.
  • Active Alarms – Displays the number of active alarms.
  • Suspended Alarms – Displays the number of suspended alarms.

Site Map

Displays a configurable map of a system site.

  1. Layers Select – Click on the number to display a layer. Click + or – to add or remove layers.
  2. Site Image – Displays the main image. Pan and zoom the map using the mouse.
  3. Layer Configuration – Enables you to rename layers and modify elements.
  4. Add Datapoint – Enables you to create polygons to mark sections or pins to mark data points on the sitemap.
  5. Modify Datapoint – Enables you to reshape or move or delete datapoints.
  6. Zoom Controls – Click + or – to zoom in or out.

User Activity

Displays a list of active users in the system.

Configuration Options

  • Max List View – Define the number of users to display.

Web Camera

Displays configured web camera feed from an external source.

Configuration Options

  • Choose the Camera – Select a configured web camera from the drop-down menu.

Rtsp Camera

Displays configured web camera feed within the system.

Configuration Options

  • Site – Define the site where the camera is located.
  • Video Source – Select a configured camera from the drop-down menu.

Notes

Displays an interactive notepad to save text data.

  1. Add Note – Click to add a new note.
  2. Active Notes – Displays all current notes according to the date stamp.
  3. Deleted Notes – Displays all deleted notes according to the date stamp.
  4. Notepad – The main note display.
  5. Details – Displays the creator name and creation date. Click the button to delete the note.

Add Widgets

Each display panel on the Dashboard is called a Widget. ARCO enables you to control the size, positioning and data type of the Widgets.

Dashboard Layout

ARCO enables you to configure different Dashboard layouts based on your system requirements. Drag-and-drop a widget to switch locations.

Click on the Add new row link to create blank rows.

Widgets automatically orient their arrangements into a tile format.

Dashboard Configuration

ARCO enables you to configure the data display and layout of the Dashboard.

  • Dashboard Information – Configure dashboard name, role assignment, organisation and alarm type.

  • Widget Menu – Displays the list of widgets that are available for the dashboard.

  • Dashboard Display – Displays information depending on settings.

    -> Configure Widget – Click to modify the widget options and click to delete.
    -> Drag Widget – Add a widget from the menu.
    -> Add new row – Add a set row of blank widgets.

  • Command Buttons – Configuration options for the Dashboard.

    -> Delete – Delete the dashboard then to the Dashboard page.
    -> Cancel – Return to the Dashboard page.
    -> Update – Confirm the changes and return to the Dashboard page.

Dashboard Management

ARCO enables you to configure the data display and layout of the Dashboard. A Dashboard can be made available for Roles, Sites or Alarms.

  • Dashboard Type – Select the dashboard display list.

    -> For Roles – Dashboard display assigned to user roles.
    -> For Sites – Dashboard display for site details.
    -> For Alarms – Dashboard display for Alarm warnings.
    -> Marker Templates – Create custom Sitemap Icons.

  • Search bar – Enables you to search for specific users by name their Username, First name or Last name.

  • Dashboard Details – Display information about the dashboard.

  • Control Buttons – Enables you to copy, edit or view dashboards. The next section will discuss the full details about editing dashboards.

    -> Copy– Create then edit a copy of a dashboard.
    -> Edit – Modify the dashboard.
    -> View – Display a preview of the dashboard.