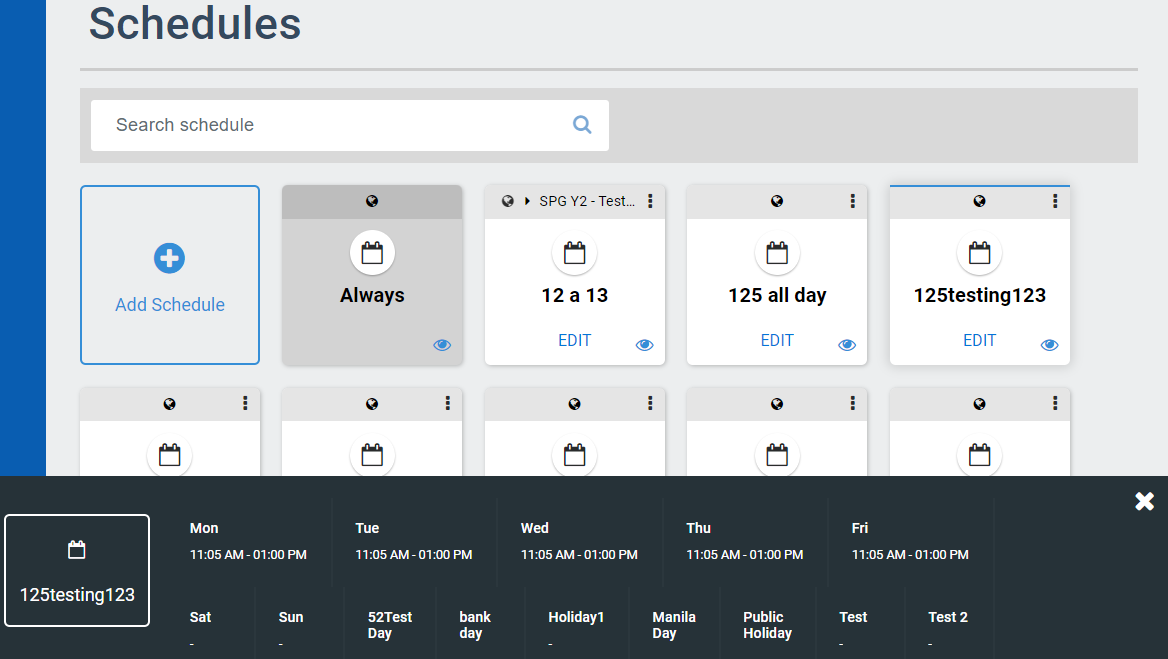
Add Schedule

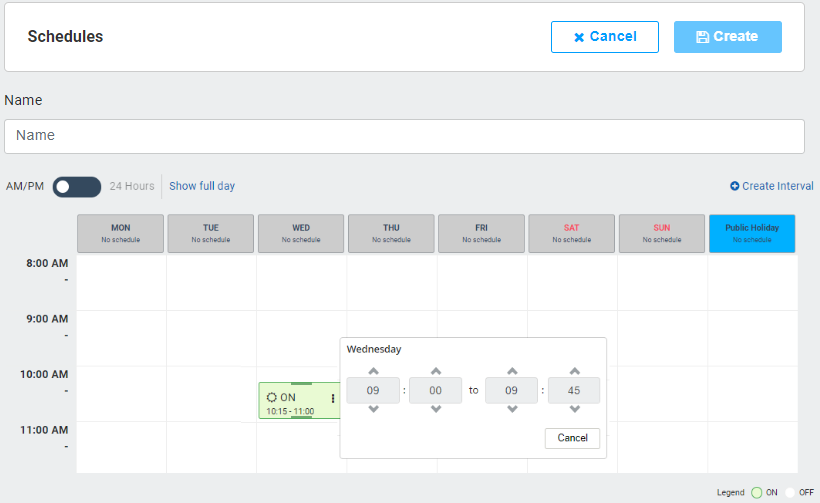
  • Create – Click to save changes to the schedule.

  • Schedule Name – Needs to be unique to each Scope. Requires alphanumeric characters with no spaces and a maximum length of 255.

  • Name – Toggle between 12-hour or 24-hour time formats.

  • Show full day – Display between 8 hour or 24-hour day length.

  • Create Interval Link– Opens the manual interval creation pop-up interface.

  • Standard Days – Displays standard day types.

  • Custom Days – Displays custom day types created in the Calendar. Please refer to the Calendar section below for more details.

  • Interval Marker – Click on a space to create an interval.

Schedule Navigation

ARCO enables you to configure Schedules that control the timing automation throughout the system. Various components, devices and functions can be synchronised by assigning the same schedule.

Schedules are used within the S1000 for four main tasks. First, they are used to determine the time windows within a day that the user is allowed to perform area mode changes or access doors. They are used within the access profiles to do this. Second, they are used to determine when a door is allowed to be set to a specific state ( Locked, unlocked, card+pin, card or pin ). Third, it’s used to specify when an area is allowed to be armed or disarmed/partial. And fourth, it’s used to determine when a macro condition is valid. A time schedule consists of a daytype that determines the DOW or calendar specified day type ( for example holiday), a series of up to 8 schedule periods within the day representing windows, and a property to indicate if this scheduled window within the day period is enabled or disabled. Enabled means that this window is valid, if disabled then this time window invalid is ignored. Refer to the Door operation for schedules on a Door. Refer to the user operation for schedules on a user.

  • Search bar – Enables you to search for specific Schedules using their name. The search bar automatically starts searching after typing at least four characters.

  • Add Schedule panel – Enables you to add new Schedule in ARCO. The next section will discuss the full details about adding Schedules.

  • Schedule Panel – Displays the available Schedules in the system. The Always panel is available by default.

  • Edit – Update the information on the selected Schedules.

  • Preview – Click to display the details of the selected Schedule at the bottom of the screen.

  • Preview Display – The details of the Schedule.

Preview is consistently available on all ARCO Modules that utilises the Schedule panel.