
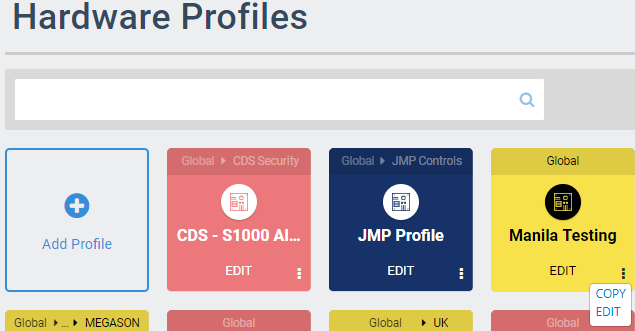
Hardware Profiles
-
Search bar – Enables you to search for specific profiles using their name or description. The search bar automatically starts searching after typing at least four characters.
-
Add Profile Panel – Enables you to add new profiles in ARCO. The next section will discuss the full details about adding profiles.
-
Profile Panel – Displays the available profiles in the system.
-
Edit – Update the information on the selected Profile.
-
Quick Access – Click the dots to display the following commands.
-> Copy – Create a new Profile using the same data.
-> Edit – Update the information on the selected Profile.
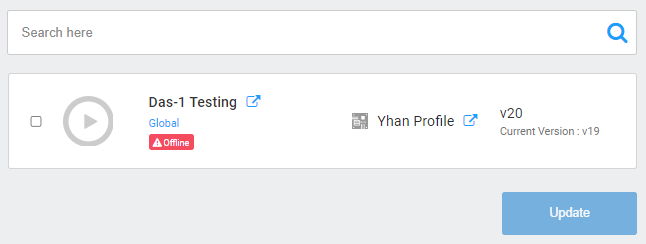
Update Site
-
Search bar – Enables you to search for specific Sites.
-
Site List – Displays the complete list of Sites in your organisation. Each column contains the following information:
-> Checkbox – You can click on the checkbox to perform an Update action on the selected sites. Several sites can be selected at once. Clicking on the topmost checkbox selects all sites displayed.
-> Site Name – This column displays the Site’s main identifier in ARCO. Site names need to be unique. The names are listed in alphabetical order by default.
-> Organisation – This column displays the organisation the site belongs to.
-> Profile Name – This column displays the Site’s profile settings in ARCO.
-> Current Version – This column displays the current firmware version of the site.
-> New Version – This column displays the new firmware version available for the site. -
Update Selected button – Enables you to update the selected sites firmware in ARCO. The next section will discuss the full details about updating the firmware.
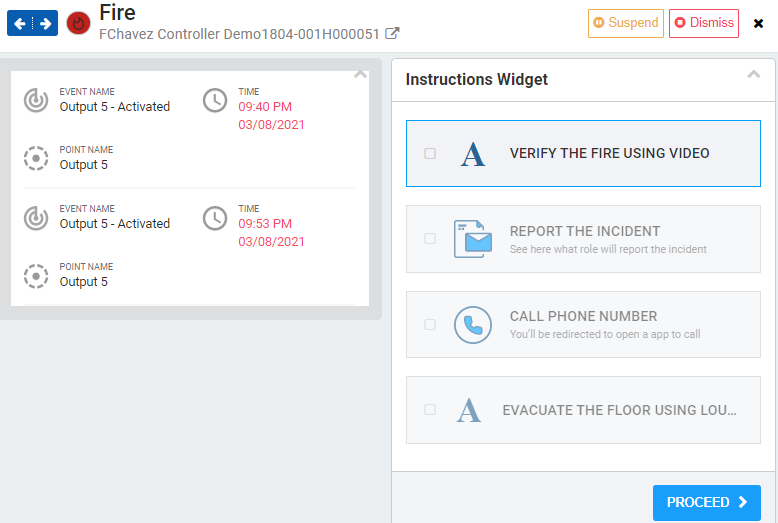
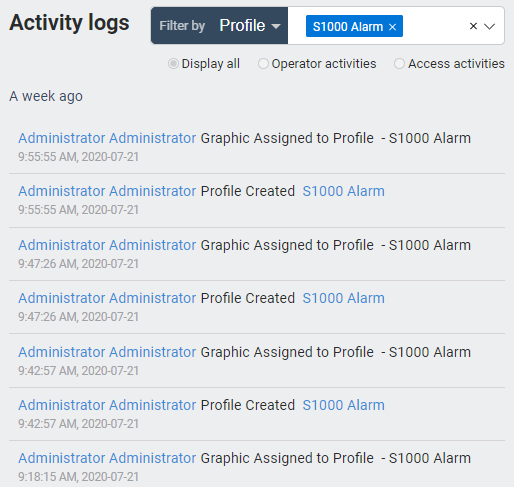
Alarm Navigation
-
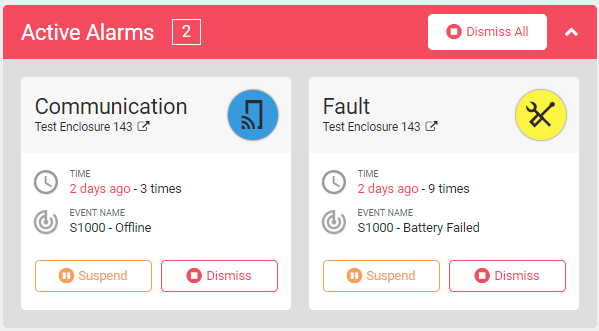
Active Alarm – Displays the numerical value of all currently active alarms in the system.
Clicking on the Alarm Panel sends you to the Alarm Dashboard. -
Dismiss All – Click to ignore all active alarms in the system.
-
Alarm Name – Displays the custom name of the alarm. Please refer to the Alarm Kind section below for more details.
-
Alarm Icon – Displays the custom icon of the alarm. Please refer to the Alarm Kind section below for more details.
-
Alarm Details – Displays the timestamp of the alarm and the event name trigger.
-
Control Buttons – Click to suspend or dismiss the selected alarm.
Site Navigation
-
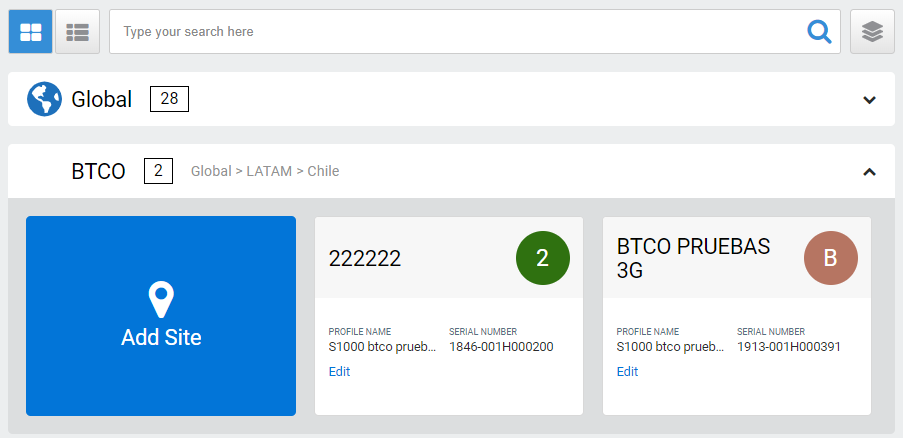
Search bar – Enables you to search for specific Sites by their Name.
-
Organisation filter – Click to open and close panels for each organisation.
-
Add Site card– Enables you to add a new site in ARCO. The next section will discuss the full details about adding sites.
-
Card Panel – Displays the details of the Site. Click to view the Site Dashboard.
-
Edit – Modify the site information.
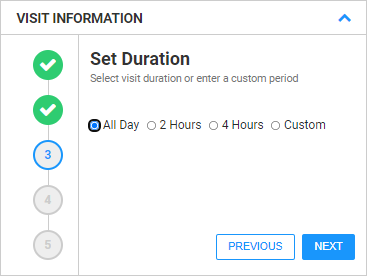
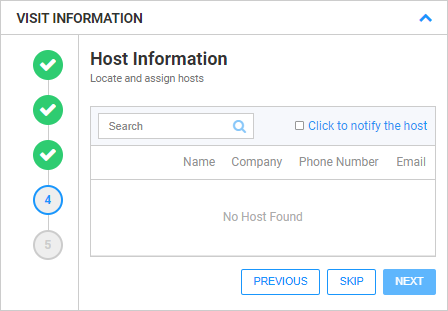
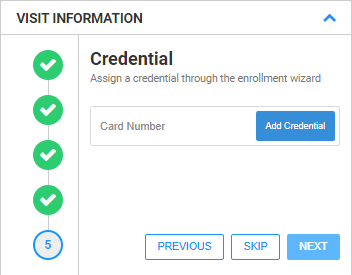
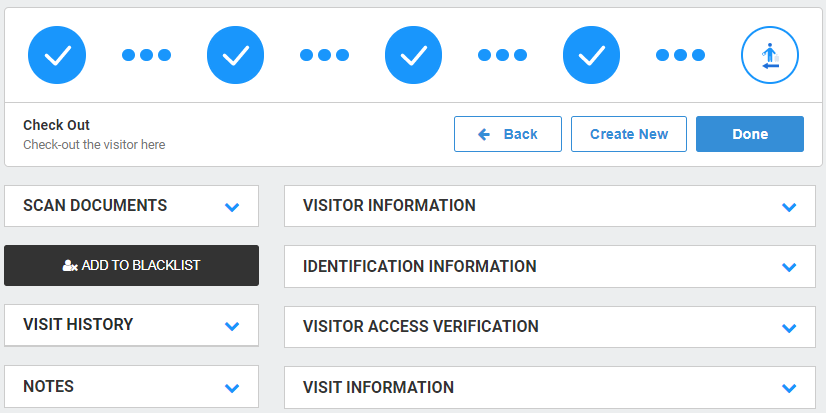
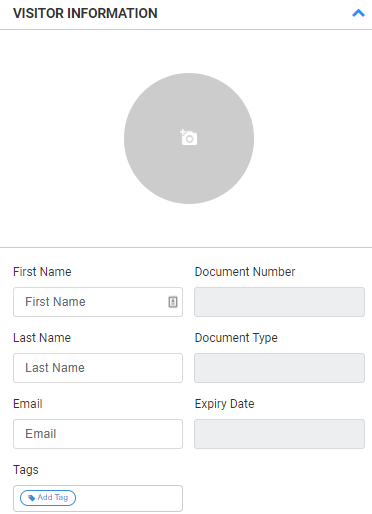
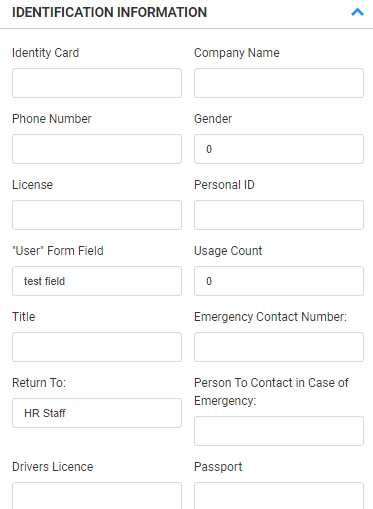
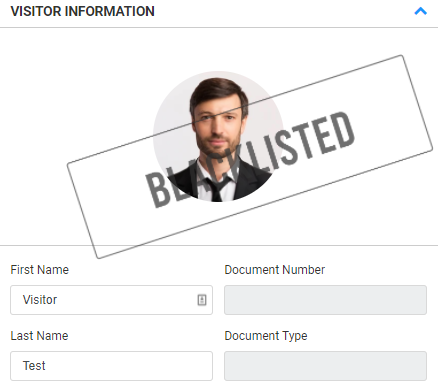
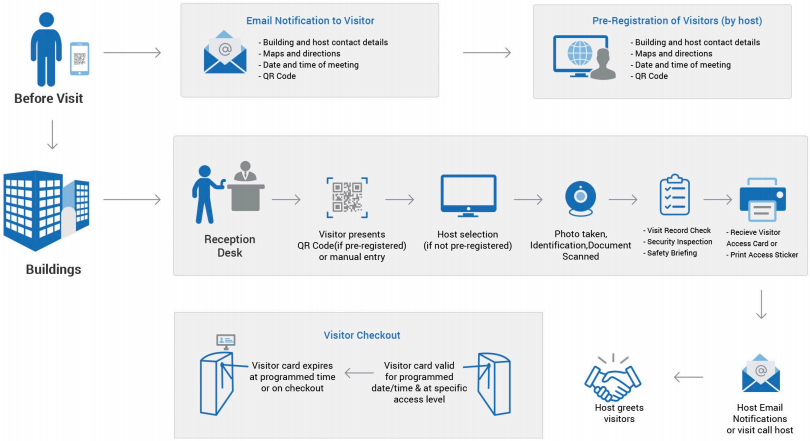
Visitor Page
-
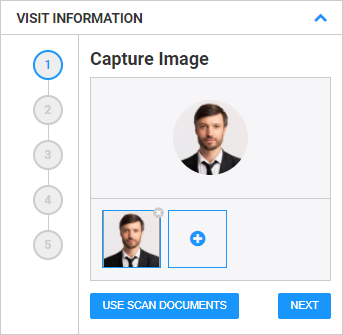
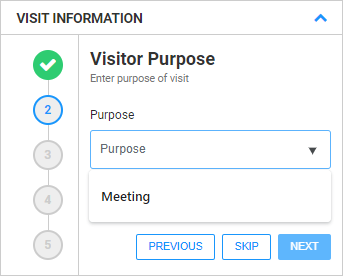
Visitor Workflow – Always displayed at the top of the module to signify where you are on the visitor management process.
-
Navigation Buttons
-> Back – Click to return to go back to the previous workflow.
-> Create New – Click to create a new Visitor.
-> Done – Click to return to the Visitor Search. -
Action Panels – Click to expand Visitor Information and Perform Visitor management actions.

Credential Navigation

-
Search bar – Enables you to search for specific Credentials. The search bar automatically starts searching after typing at least four characters.
-
Organisation filter – Click to open and close panels for each organisation.
-
Credential Card Panel – Displays the complete list of credentials in your organisation.
-> Card Number – Value of the card registered to the credential.
-> Credential Profile – Value of the card registered to the credential.
-> Facility – The Site Facility the credential belongs to.
-> Assigned to – Name of the user who holds the credentials.
-> Status – Displays if the card is Active or Deactivated -
Load More button – Click to display additional available credentials.