

Widget Types
A variety of Widgets are available based on what information you want to display on your Dashboard.
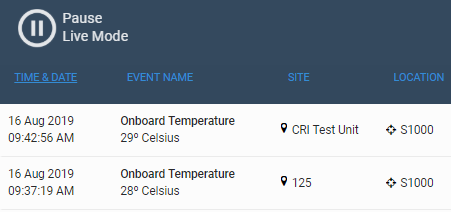
Event List
Displays a chronological list of events in real-time.
Configuration Options
- Max Events – Define the number of events to display.
- Use Elastic – Toggle ON or OFF
- Display Events – Select from the drop-down menu.
Google Map
Displays a map with pin locations for all available sites.
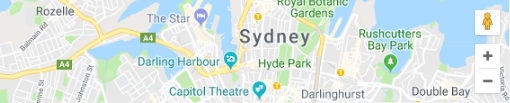
Configuration Options
- Height – Define the map height in pixels or percent screen coverage
Header
Displays configurable title and description to help organise widgets.
Configuration Options
- Header – Displays text in large font.
- Subheader – Displays text in small font.
- Splitter – Check to display a vertical line to divide sections visually.
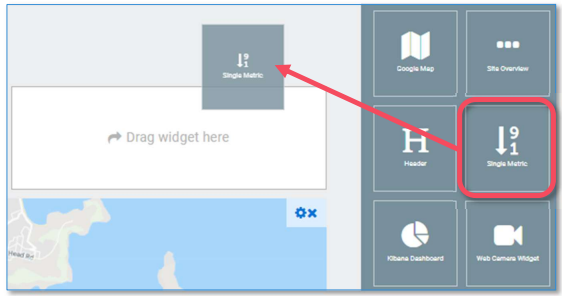
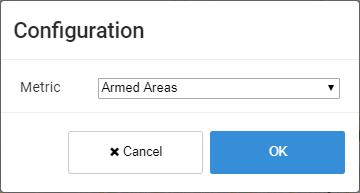
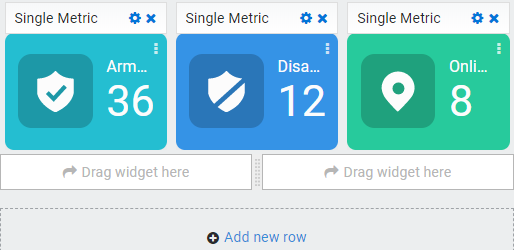
Single Metric
Displays the real-time value of a single data point.

Configuration Options
- Armed Areas – Displays the number of armed areas.
- Armed Sites – Displays the number of armed sites.
- Disarmed Areas – Displays the number of disarmed sites.
- Disarmed Sites – Displays the number of disarmed sites.
- Offline Sites – Displays the number of offline sites.
- Online Sites – Displays the number of online sites.
- Active Alarms – Displays the number of active alarms.
- Suspended Alarms – Displays the number of suspended alarms.
Site Map
Displays a configurable map of a system site.
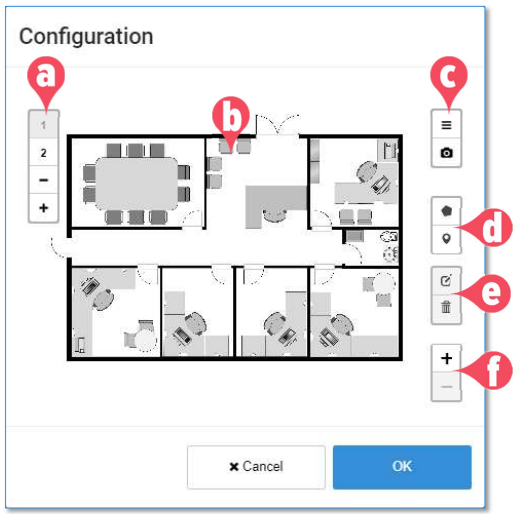
- Layers Select – Click on the number to display a layer. Click + or – to add or remove layers.
- Site Image – Displays the main image. Pan and zoom the map using the mouse.
- Layer Configuration – Enables you to rename layers and modify elements.
- Add Datapoint – Enables you to create polygons to mark sections or pins to mark data points on the sitemap.
- Modify Datapoint – Enables you to reshape or move or delete datapoints.
- Zoom Controls – Click + or – to zoom in or out.
User Activity
Displays a list of active users in the system.
Configuration Options
- Max List View – Define the number of users to display.
Web Camera
Displays configured web camera feed from an external source.

Configuration Options
- Choose the Camera – Select a configured web camera from the drop-down menu.
Rtsp Camera
Displays configured web camera feed within the system.
Configuration Options
- Site – Define the site where the camera is located.
- Video Source – Select a configured camera from the drop-down menu.
Notes
Displays an interactive notepad to save text data.
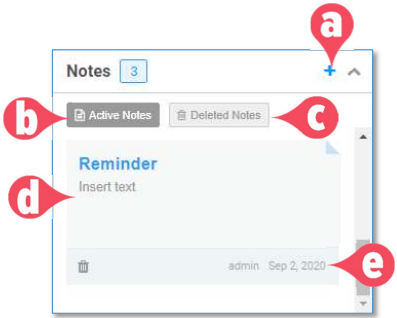
- Add Note – Click to add a new note.
- Active Notes – Displays all current notes according to the date stamp.
- Deleted Notes – Displays all deleted notes according to the date stamp.
- Notepad – The main note display.
- Details – Displays the creator name and creation date. Click the button to delete the note.
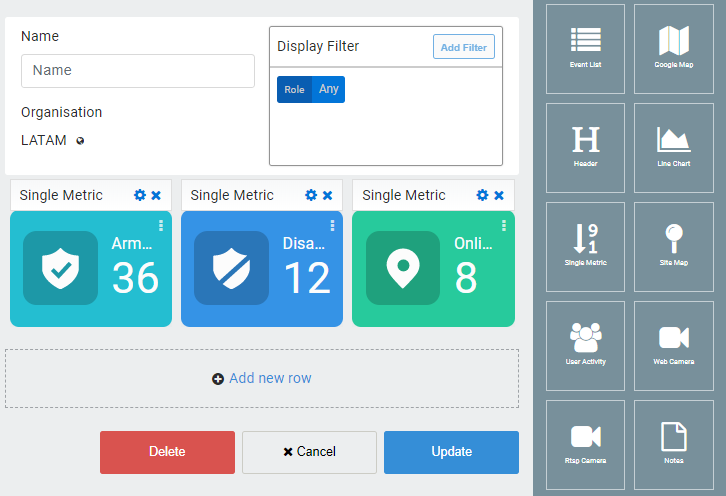
Dashboard Configuration
-
Dashboard Information – Configure dashboard name, role assignment, organisation and alarm type.
-
Widget Menu – Displays the list of widgets that are available for the dashboard.
-
Dashboard Display – Displays information depending on settings.
-> Configure Widget – Click to modify the widget options and click to delete.
-> Drag Widget – Add a widget from the menu.
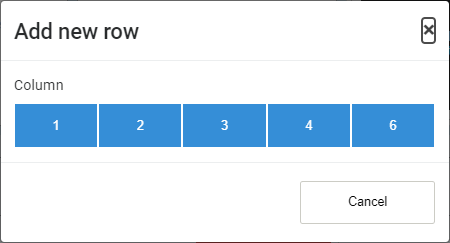
-> Add new row – Add a set row of blank widgets. -
Command Buttons – Configuration options for the Dashboard.
-> Delete – Delete the dashboard then to the Dashboard page.
-> Cancel – Return to the Dashboard page.
-> Update – Confirm the changes and return to the Dashboard page.
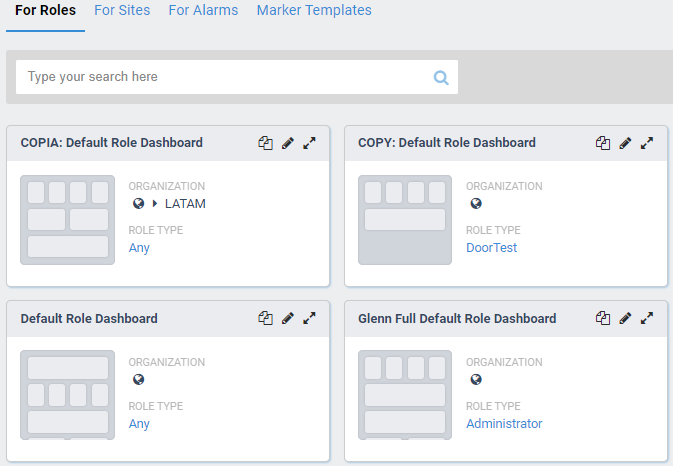
Dashboard Management
-
Dashboard Type – Select the dashboard display list.
-> For Roles – Dashboard display assigned to user roles.
-> For Sites – Dashboard display for site details.
-> For Alarms – Dashboard display for Alarm warnings.
-> Marker Templates – Create custom Sitemap Icons. -
Search bar – Enables you to search for specific users by name their Username, First name or Last name.
-
Dashboard Details – Display information about the dashboard.
-
Control Buttons – Enables you to copy, edit or view dashboards. The next section will discuss the full details about editing dashboards.
-> Copy– Create then edit a copy of a dashboard.
-> Edit – Modify the dashboard.
-> View – Display a preview of the dashboard.